Art Concrete How-to
3b: Working with Mesh, Step by Step
THIS PAGE is one of several explaining techniques about how to use concrete in small-scale art projects.
| Book: Concrete Handbook for Artists: Technical Notes for Small-scale Objects. More information? |
It is a brief step by step summary, showing a method of applying three layers of concrete (cement) onto a pre-made form. Steel mesh is used to provide strength to the structure. This is a simple technique for sculptural forms that are defined by planes. It was used in this sculpture. See the mixes page for mix proportions.
|
Parts are cut out of plastic board to make the three-dimensional form. Strong cardboard can also be used. |
|
The parts are taped together into a three-dimensional form using packing tape, masking tape or duct tape. If you use cardboard you must completely cover it in waterproof tape. |
|
Steel mesh is wrapped around the form. You can use chicken wire, expanded mesh, hardware cloth (see the sources page). Loose ends of the wire are tucked in using pliers. With the thinner mesh you may need two or three layers for strength. |
|
Mix the concrete and apply it by hand (wear gloves --- please read the hazards page if you haven't already done so!) pushing it well through and around the mesh. The wire must be completely surrounded. See other areas of this site for mix proportions. You want a mix that is clay-like; if you make a ball with it, the ball should hold together, not slump too much. If it's too wet or too dry the mix will not stick to the wire. |
|
The concrete is applied to one side of the form. It is difficult to get the concrete to hold upside down, so after completing the top side and most of the vertical parts, leave the piece for 12 to 24 hours. Cover it in plastic to prevent water loss. |
|
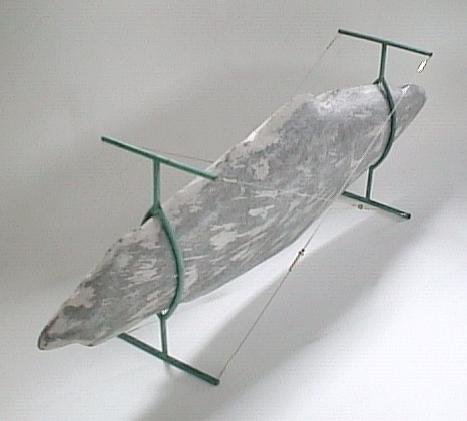
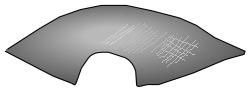
After the concrete has set on that first side you may want to rough sand or file it. Flip the piece over --- it looks like this. Now mix up more concrete and apply it to this side. Cover and let it set for another 12 to 24 hours. |
|
|
The first layer has been applied to both sides. Rough sand (16 to 24 grit) or file it as you like. At this point it should be hard enough not to break and soft enough to sand. (Wear gloves and a mask.) |
|
After this sanding, apply a second layer of concrete to the top surfaces. Let set for 12 to 24 hours, covered. This could be textured before or after the set. This second layer means the concrete is now 1 to 2 cm thick on that surface. |
|
|
Sand that layer, flip the piece, and apply a second layer to the reverse side. Again, the surface could be textured. |
|
Mix up a finer concrete mix if you want a dense or polished surface. Apply this mix to one side with a trowel or a spatula. Let it set. |
|
|
Flip it over and apply a fine mix to the other side. Let it set 12 to 24 hours. |
|
Wet sand this fine surface with a wet/dry sand paper, emery paper, or corundum paper (120 through to 400 grit) if you want a smooth surface. The piece should then be covered and kept damp for a week or longer, then sanded again to remove stains, dried and sealed. |
Back to Mesh Page
| Home | HOW-TO | Materials | Small Scale | Mesh | Casting | Colour | Hazards | Books | Sources | Shapecrete |
CONTACT + LEGAL
Last update: 2016.